
Introduction
Have you ever wanted to learn how to draw a stunning rose, but weren’t sure where to start? Whether you’re looking to impress someone special with your artwork, decorate a greeting card, or just enjoy a relaxing drawing session, learning how to draw roses is a great skill to develop! In this blog, I’ll walk you through five easy steps to draw a beautiful rose, plus some bonus tips on types of roses and ways to make your drawings even more creative.
Let’s dive into this fun and rewarding artistic journey!
Step 1: Draw the Rose Center and Spiral

The first step in drawing a rose is to create the foundation. Begin by drawing a small circle in the middle of your paper. This circle will serve as the center of the rose.
- Tip: Keep your lines light, as you’ll erase this circle later.
Inside this circle, draw a small spiral. Think of it like drawing a snail shell or a swirl on a lollipop. This spiral will represent the tightly-packed, small petals in the center of the rose. The spiral will form the starting point for the rest of the flower’s petals.
Step 2: Add the First Layer of Petals

Around the spiral, begin adding the first layer of petals. Draw small, curvy shapes that overlap slightly, making sure they are wavy rather than straight. These petals should look like they are gently unfolding from the center.
- Tip: Don’t worry about perfection! Petals come in various sizes and shapes, so some irregularity will make your rose look more natural.
The goal is to create a sense of depth by layering the petals around the spiral, keeping in mind that roses have many overlapping petals. You can add as many as you like—just keep the shapes soft and fluid!
Step 3: Add More Layers of Petals
Once you’ve drawn the first layer, it’s time to expand the rose by adding more petals. Keep drawing larger petals around the first layer. As you add layers, the petals should start to look more open, gradually growing bigger as they move outward.
- Tip: Vary the size and curvature of the petals to avoid making them look too uniform. Some petals can be slightly longer or more curved, while others may be more rounded or flat.
Step 4: Draw the Stem and Leaves

After you’ve added enough petals to your rose, it’s time to draw the stem and leaves. Start by drawing two straight lines coming down from the bottom of your rose to form the stem. Roses typically have long, straight stems with a slight curve.
- Leaves: Draw oval-shaped leaves with pointed tips along the stem. Rose leaves usually grow in pairs, so add a few leaves on each side of the stem, making them look natural and slightly asymmetrical.
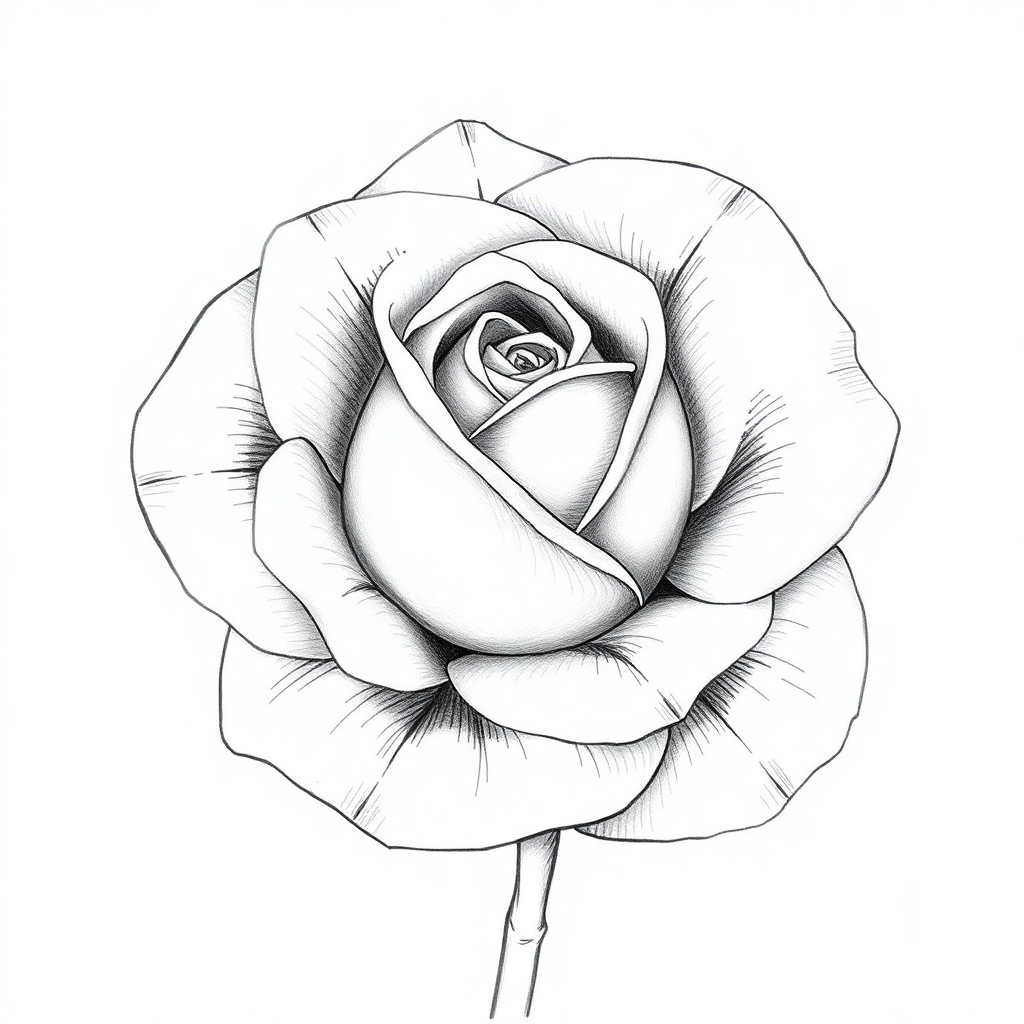
Step 5: Add Shading and Final Details
To make your rose look more realistic, you’ll need to add shading and some finishing touches. Begin by using light pencil strokes to shade the edges of the petals. Focus on the areas where the petals overlap, as this is where shadows naturally form. Add shading on the leaves as well, emphasizing their veins and texture.
- Tip: Leave some parts of the petals light to show where the light hits them, creating highlights for a shiny, three-dimensional effect.
For extra flair, you can also outline the edges of the petals and leaves with a darker pencil or pen to make the details pop.
Fun Ideas to Make Your Rose Drawing Special
Once you’ve drawn your rose, you can use it in all kinds of creative ways:
1. Make a Greeting Card
- Write a sweet message under your rose and give it to someone special, like your parents, teachers, or friends.
2. Create a Rose Garden
- Draw multiple roses on the same page, each in a different color. You can make a whole garden of beautiful flowers.
3. Add a Background
- Draw a sunny sky, butterflies, or a vase to put your rose in. This will make your drawing even more interesting.
4. Experiment with Styles
- Try drawing a cartoon rose, a realistic rose, or even an abstract rose with fun patterns inside the petals.
Tips for Making Your Rose Drawings Even Better
If you want to take your rose drawings to the next level, here are some bonus tips to help you improve:
- Practice Shading: The more you practice shading, the better you’ll get at creating depth. Start with simple shapes and gradually move on to more complex subjects like roses.
- Use References: Look at pictures or real roses to study the shape and arrangement of the petals. Understanding how real roses look will help you add more realistic details to your drawings.
- Experiment with Different Styles: Try drawing roses in different artistic styles! You could try a realistic rose, a cartoon-style rose, or even an abstract rose with fun patterns in the petals.
- Play with Color: While traditional roses are red, pink, or yellow, don’t hesitate to experiment with different colors. Imagine a blue rose, or perhaps a rainbow-colored rose—your artistic choices are endless!
Common Mistakes and How to Fix Them
Sometimes, drawing roses can be tricky. Here are a few common mistakes kids make and how to fix them:
- Mistake: The petals look too square. Fix: Make your lines curvy and wavy. Petals are soft and round, not straight.
- Mistake: The rose looks flat. Fix: Add shading and highlights to make your rose look three-dimensional.
- Mistake: The petals don’t look connected. Fix: Make sure each petal overlaps the one before it. This makes your rose look more realistic.
- Mistake: The stem is too short. Fix: Draw a longer stem and add a few leaves to balance the drawing.
Experiment with Different Rose Varieties
Once you’ve mastered drawing a standard rose, try expanding your artistic skills by experimenting with different types of roses. Each variety has its own distinct features, and learning to draw them will help you become more versatile as an artist. Here are a few varieties you can try:
- Tea Roses: These are elegant roses with long, slender petals that tend to curl gently at the edges. They usually have a more open bloom with a flatter center. To draw a tea rose, try creating longer, flowing petals that gradually get larger as they move outward from the center. Add a few delicate folds to show the softness of the petals.
- Wild Roses: Wild roses have a more natural and less structured shape compared to cultivated roses. They often feature a simpler arrangement of petals with some irregularities in their size and shape. To capture the wild rose’s charm, focus on fewer, slightly asymmetrical petals. Add little details like small insects or uneven petal edges to emphasize the organic nature of the flower.
- Climbing Roses: These roses grow on vines and are often smaller and more delicate. The flowers tend to appear in clusters. For climbing roses, try drawing the rose in a position where it’s wrapped around a vine or trellis. You can show the petals as being a bit smaller and the stem or vine as winding through the picture.
By practicing different types of roses, you’ll not only enhance your technique but also develop a better understanding of how roses can vary in shape, size, and complexity.
Draw a Rose from Different Angles
To improve your drawing skills further, practice sketching roses from various perspectives. This will teach you how to represent a three-dimensional object in two dimensions and add depth to your drawings.
- Top View: Imagine looking down at the rose from above. The petals will appear in a circular pattern, and you’ll need to show the overlapping layers in a way that represents their natural spiral. Focus on the symmetry of the petals, which will be most noticeable from this angle.
- Side View: In this perspective, you can show the three-dimensional nature of the rose. The petals will be stacked on top of one another, with the ones in the back being partially obscured by the ones in the front. Pay attention to the curvature of the petals and the gradual unfolding as you move outward from the center.
- Close-up: A close-up view allows you to zoom in on a specific part of the rose. You can focus on individual petals, capturing the texture and veins in great detail. Highlight the subtle curves and folds of the petals, and pay attention to the soft gradation of light and dark where the petals overlap.
Changing the perspective of your roses will give you a better understanding of how light and space interact with the flower, and it will allow you to experiment with different compositions.
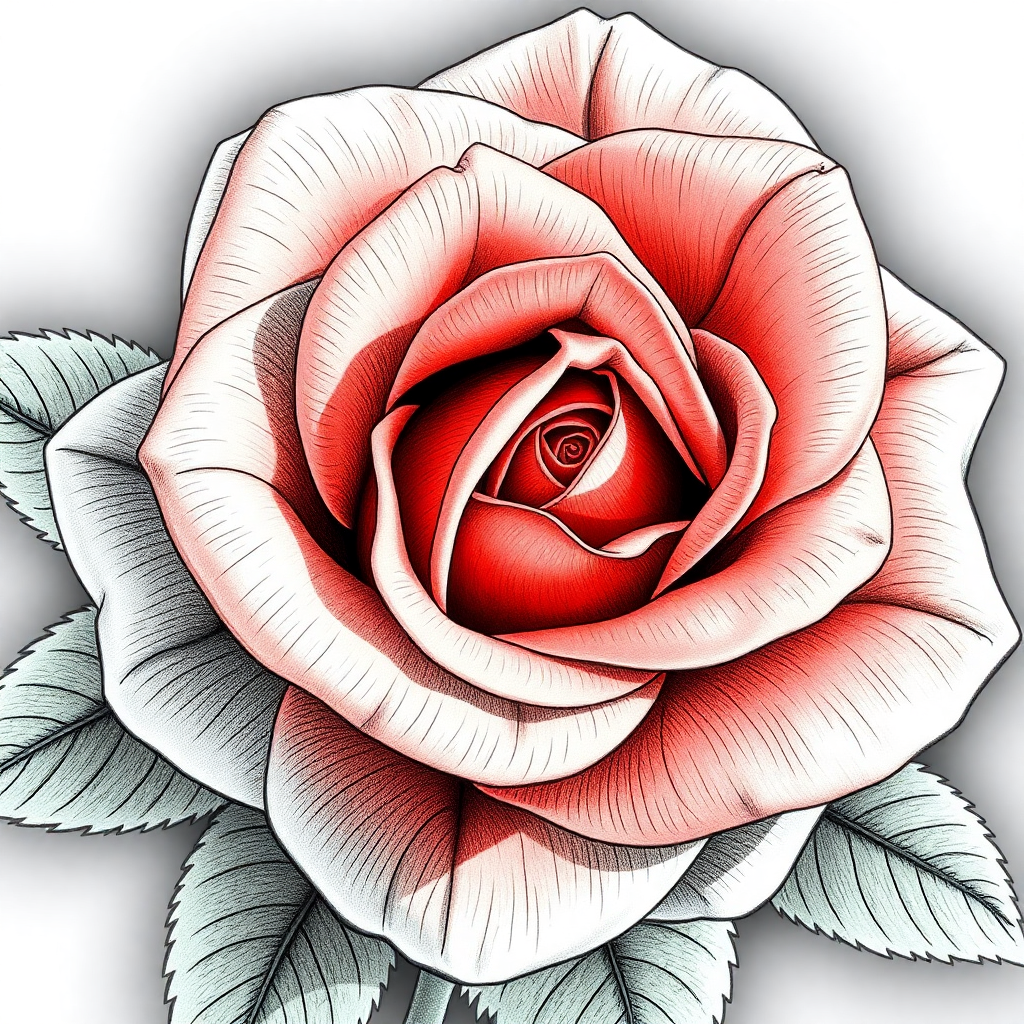
Adding Depth with Light and Shadow
One of the most important aspects of drawing is creating depth and dimension. Adding light and shadow makes your rose drawing look more realistic and lifelike. Here’s how to effectively add depth to your rose:
- Use Different Pencil Shades: Start by lightly shading the petals, then gradually increase the darkness on the areas where shadows naturally fall. For example, the edges of the petals might be darker, while the center where the light hits can remain lighter. Remember to keep your shading soft and smooth for a more realistic effect.
- Shadowing the Stem and Leaves: Don’t forget that shading isn’t just for the flower. Add darker areas to the stem where it’s less exposed to light, and apply shading to the leaves as well. For example, the underside of the leaves should be darker, while the top should be lighter. Adding shadows to the stem can also make it appear more three-dimensional.
- Refining the Highlights: To make the petals look even more dynamic, leave small areas of the petals white, especially where the light hits them directly. You can use a white pencil, gel pen, or eraser to create these highlights. These little touches will help make your rose look more three-dimensional and vibrant.
Celebrate Your Artwork
Now that your rose drawing is finished, take a moment to appreciate your hard work and creativity. It’s a good idea to celebrate and reflect on your artistic journey, and here’s how you can do that:
- Frame Your Drawing: Displaying your artwork in a frame will allow you to admire it and share it with others. Choose a frame that complements the style and colors of your rose. You can even hang it in your room to inspire your next art project.
- Create More Roses: Now that you’ve mastered drawing a single rose, challenge yourself by creating a bouquet of roses. You could draw a variety of colors and types to make the bouquet more dynamic and visually interesting. You might even create a whole garden of roses on one page!
- Share It with Loved Ones: Roses are symbols of love and beauty. Give your drawing as a gift to family, friends, or teachers. They will surely appreciate your artistic effort and thoughtfulness.
- Post It Online: With permission from your parents, consider sharing your rose drawing on social media platforms or in online art groups. You might inspire others with your creativity, and it’s a great way to build a community of fellow artists.
- Start an Art Journal: If you enjoy drawing roses, keep a sketchbook or art journal to track your progress. Each page could showcase a new version of a rose or a different color combination. Over time, you’ll be able to see how much you’ve improved.